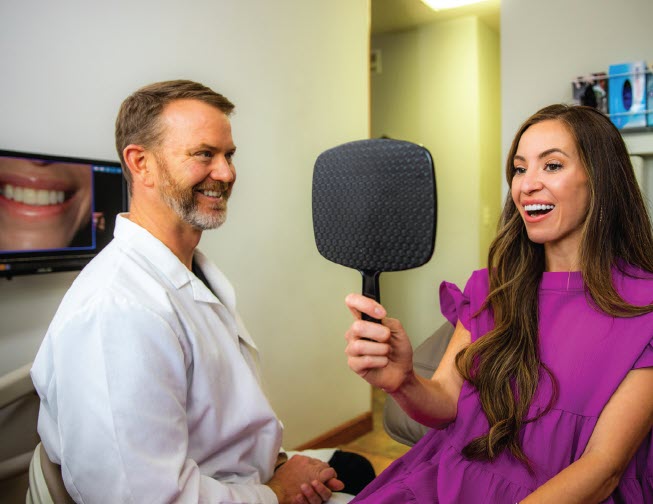
In June 2021, Aimee came to my office at Mill Creek Dental in Shawnee, KS, because she was unhappy with the veneers she had from another office. I was her second opinion. Aimee had six veneers that were only a few years old. To most people, Aimee’s smile was fine. But she wasn’t satisfied with okay or even good—Aimee wanted her teeth to look great.
Taking a smile from good to great is one of the most challenging cosmetic cases that dentists can encounter. It’s relatively easy to please a patient who has a terrible smile by taking that smile to “good.” But taking a case from good to great means the patient has higher expectations, which can make things more difficult.
With Aimee, she didn’t think her veneers “fit” her face. She said they seemed bulky and didn’t “fill in” her smile. From my perspective, I noticed that the veneers didn’t fill in her buccal corridors. She had a narrow arch and wanted a fuller and more symmetric smile proportionate to her face. Aimee mentioned that prior to veneers, she had undergone three sets of braces trying to “fix” her smile.
A SOCIAL MEDIA INFLUENCER
Aimee’s smile is especially important because her full-time career is on social media (AIMEE@planesandprettythings). She travels frequently and has a large Instagram following. She takes multiple photos of herself every day and overall, she didn’t feel good about her smile.
Taking a smile from good to great is one of the most challenging cosmetic cases that dentists can encounter.ints and it becomes a repetitive process.
Aimee found me through Instagram. I had just started posting before-and-after cases on the networking app. I post on social media to attract new patients with virtual consult requests, and Aimee reached out for a consult.
In a virtual visit, dentists can show potential patients the possibilities with before-and-after photos of other patients and talk about prices, and then when the patient comes in, they are usually already sold. I’ve found the acceptance rate from virtual consults to be high. And that’s just what happened with Aimee. During a virtual visit, we discussed what might be possible for her, and she decided to return for an in-person consult, despite the fact that she lives in another state.
STARTING OUT
During the initial exam, I noted that Aimee’s teeth were functionally healthy—they weren’t breaking, they weren’t causing any issues, and there was no decay or anything like that. Her case was purely an aesthetic one. I realized that the case might be tricky because taking a patient from good to great means the dentist has to get it right and nail it.
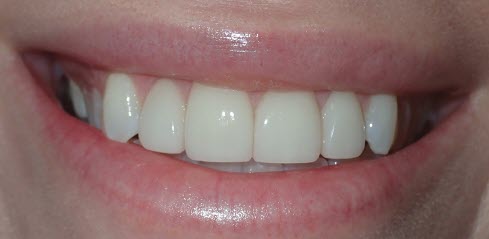
After the exam, I recommended a few more veneers to widen the arch (10 new veneers in total) instead of just replacing the 6 she currently had. Her veneers went from canine to canine, and I suggested adding the premolars on both sides. It would fill out her arch and we could make things brighter and whiter like she wanted.
We discussed what might be possible for her, and she decided to return for an in-person consult, despite the fact that she lives in another state.
We also looked at different smile designs, including natural, Hollywood, and some other options. I wanted to make sure that my team understood what Aimee wanted. Like many patients, she said, “Oh, I didn’t know we had all these options.” I tried to set realistic expectations for what the process would involve. I also explained how I would work closely with Arrowhead Dental Laboratory throughout the procedure.
PHOTOS, COMMUNICATION, AND TESTING
To take a patient from good to great, it’s important to have good photography, excellent communication with the lab, and the patient’s approval after a “test drive” of the smile with temporaries. A lab with expertise in highly aesthetic cases is vital to the outcome.
With every full arch case, I start by taking good records. I take either alginates or a scan with our iTero to send to Arrowhead for an aesthetic white wax-up. The wax-up shows us what’s possible for the smile. With Arrowhead, I know they’re going to pay attention to the details, and they offer advice on getting everything exactly right. For example, on the alginate impressions, Arrowhead asked about gingival recontouring for Aimee and marked exactly where it should go.

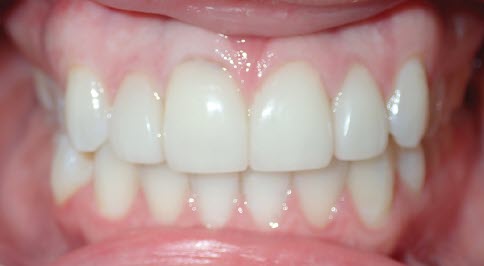
Using digital photography and a photo application was helpful because I could draw on the pre-op photos to show the lab what they needed, based on the patient’s wishes. Another option for good-to-great cases is to use light-cured, unbonded flowable composite and create the smile chairside on the patient. To do so, place the flowable, then cure, shape, and smooth to the desired aesthetic result. Then take photos and an impression to communicate the expectations of the wax-up.
It’s important to have good photography, excellent communication with the lab, and the patient’s approval after a “test-drive” of the smile with temporaries.
Once the lab receives the preliminary models and/or a digital scan and photos, it is important to review the case with a technical representative at the lab. This step is a must for challenging cases in order to communicate the desired results in detail and problem-solve any potential issues.
PREP DAY
When Aimee came in for the treatment, I was able to place the temps without any unexpected issues. I used the putty matrix that was provided by Arrowhead to place the temporaries. I like to add my final touches to perfect the smile with flowable composite and polishing discs. I also pack cord for almost all my crown/veneer preps. During the impressions, I place Kerr 2a GingiBRAID+™ retraction cord. With this extra step, I know I can give Arrowhead a perfect impression with a 0.5 mm cervical margin, so that I can receive a perfect-fitting restoration in return. And I mean perfect—with zero adjustments.
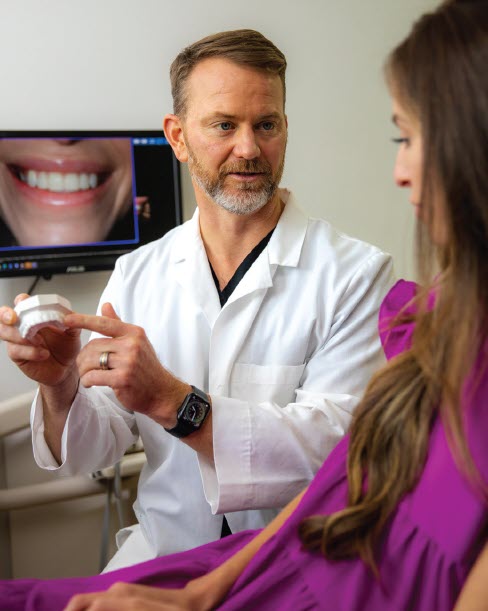
It is important to review the case with a technical representative at the lab.
I like to prep the margin to the gumline exactly, then place cord, and finally re-prep to lower the margin 0.5 mm so it will be subgingival. I also take prep shade photos. Lastly, I ask the patient to return one week after they are in the temps to give them ample time to try them out. This ensures satisfaction is met. If something is unsatisfactory and changes need to be made, then at the one-week follow-up appointment I’ll add flowable composite and reshape chairside until expectations are met by both the patient and me.
If any changes are made, I take a new scan/impression along with digital photos and send everything off to the lab with the case. If significant changes from the wax-up are required, then a second phone consult with the technical rep is helpful.
I recommended that Aimee spend a little more time in the temps than usual so she could get used to the new restorations and really contemplate any changes she might want for the final restorations.
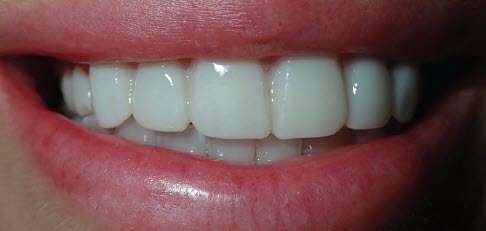
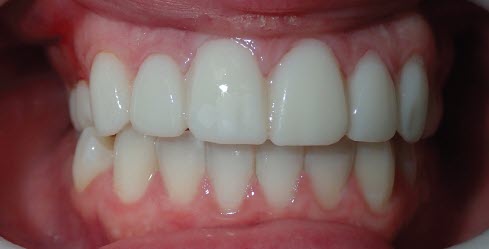
With Aimee, because we wanted everything to be perfect, there were a couple of minor things she wanted to change on the temps. So, when she returned to the office a week after we placed the temporaries, I made a few adjustments: we changed the length on a few teeth and made a couple of teeth slightly larger using composite to widen the smile even more. I used the Luxatemp® bleach shade for the temporaries, and she loved that.
Aimee tried out the adjusted temporaries for another week to ensure she was happy with everything. When aiming for the highest outcomes, it’s beneficial to have patients in the temporaries for a trial run—they can try them out in their everyday life and show them to their friends and family for feedback.
Once Aimee was thrilled with everything, we took an alginate of the adjusted temps, poured it up, and took photos to send to Arrowhead so they knew exactly what the patient was looking for.
About a week prior to the seating appointment, I asked Aimee to use chlorhexidine as prescribed to help maintain her healthy gingiva and limit the potential of a bloody environment. If a patient uses chlorhexidine any longer than that, I find the temps begin to stain.
THE FINAL REVEAL
She said she loved everything about her new smile and hugged all our team members.
When she came in to have her case seated, everything went smoothly. At delivery appointments, if any bleeding is present once the temporaries are removed, cleaning the teeth with chlorhexidine is my preferred treatment. I use peroxide on a cotton pellet or GINGI-PAK®.
With highly aesthetic cases, I typically try-in on the patient without using try-in paste. I ask the patient to approve everything first, and then I bond the restorations on using Monobond and Variolink® Esthetic light-cured adhesive cement with DeOx™ barrier from Ultradent™. This prevents formation of the oxygen-inhibition layer of the surface of the resin material when polymerized.
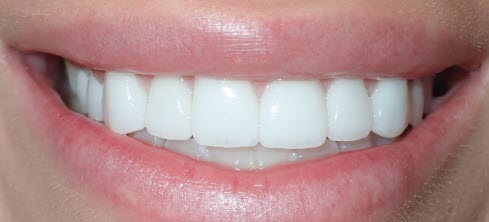


Aimee’s final shade was an OM1 with some incisal translucencies. During the last step, I sit the patient upright and look at them straight on to ensure symmetry. If something is off, I’ll use polishing discs to reshape the final veneers.
After the seating appointment, Aimee returned to the practice to make sure everything was dialed in. I asked Arrowhead to make a nocturnal orthotic to protect her veneers. The results were great. She was floored with how her smile looked! She kept smiling a big smile. She said she loved everything about her new smile and hugged all our team members. I think it exceeded her high expectations, which was the best result of all.


