

Bethany Howell is a patient who lives in Little Rock, AR, near my dental practice, Smile Dailey. Bethany does a lot of philanthropic work, and one of the organizations she works for is the Cystic Fibrosis Foundation. She was volunteering for that organization when she met my wife, and the two women started talking. It had been a while since Bethany had been to a dentist, so soon after that conversation she decided to visit my practice.
It was enough treatment that we needed to talk about her function at the same time as the aesthetics that she was hoping to improve.
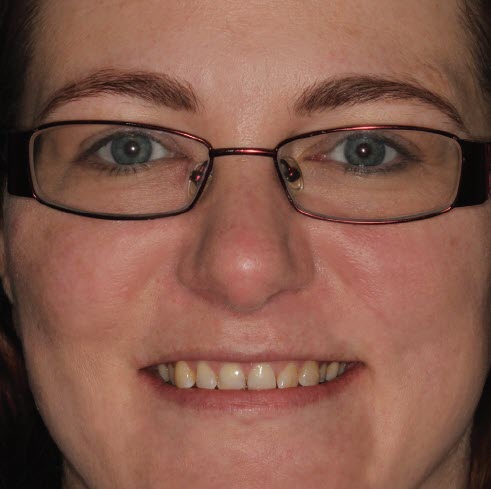
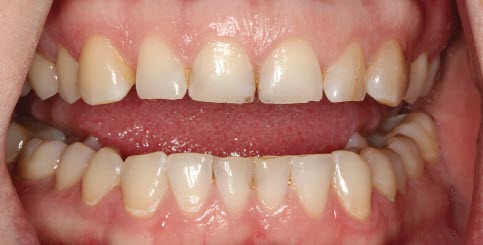
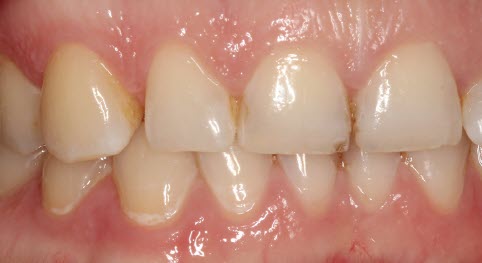
In December of 2020, when Bethany first visited the practice, she mentioned that she wasn’t happy with the appearance of her teeth, and she wanted to have everything checked out. During the exam, I discovered several cavities, and large fillings on nearly all of her teeth, and significant wear overall. Bethany had a tendency towards clenching her teeth, so there was attrition. On the lingual of her upper interiors, there was little to no enamel on the back due to erosion. Furthermore, because of the way her lower teeth were positioned against her upper teeth, there was no space to create aesthetic harmony without changing the vertical dimension. It would require enough treatment that we needed to talk about her function at the same time as the aesthetics that she was hoping to improve.
When discussing any large treatment with a patient, I try to be sensitive to the fact that it may be complicated for them to understand. I try to gain a patient’s trust by getting to know them, and then I move on to what they hope to accomplish with their teeth. It’s never about “just” aesthetics, or “just” function, or “just” health. It’s all of those goals together in a comprehensive plan. I love being conservative with my patients when I can, but that’s not what we encountered with Bethany.
When I mentioned my findings, Bethany was surprised. So I showed her some before-and-after work that I had done with Arrowhead Dental Laboratory. I started working with Arrowhead in 1999. I remember being introduced to the lab at a seminar that Dr. Dick Barnes held in Little Rock. After the event, I started using the lab, especially for large and complex cases.
With Arrowhead as part of our team, we are able to produce the positive outcomes that I want to offer to my patients. I am always pleased with the cooperation I get from the lab and the level of aesthetics we create for patients. For the past three years, I’ve worked with Jordan Johnson, a technical consultant at Arrowhead, and it’s a great relationship. I’ve always found the people at Arrowhead to be genuinely interested in getting the best results for each patient.
After seeing the before-and-after images, Bethany said, “Let’s do it.” So we figured out the financing and scheduled treatment.
GETTING STARTED
With a wax-up as a guide, I don’t have to create something freehand.
I started treatment on Bethany in July of 2021. Before prepping and placing the temps on a large case, I work closely with the lab and get a cosmetic and functional wax-up. I use that as my guide for making the temporary work, which makes it much easier on the day of the procedure. With a wax-up as a guide, I don’t have to create something freehand. It also gives the patient the ability to see where we’re headed with their smile.
I discussed smile selection with Bethany and mentioned that I typically use the Las Vegas Institute (LVI) smile guide, so she had a general idea about the direction for her smile.
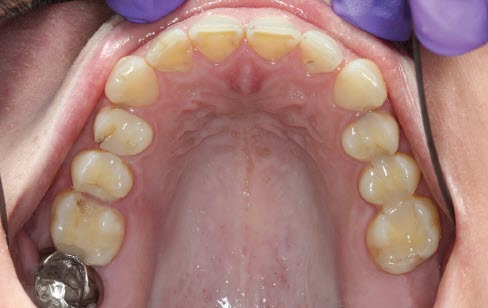
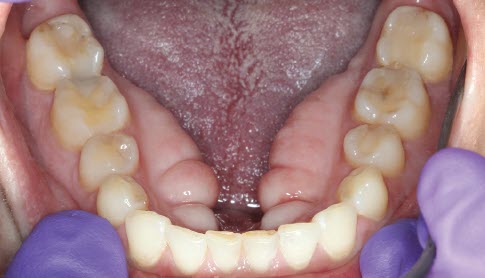
With Bethany, I did all the preps for the uppers and the lowers in one appointment. During that appointment, she requested IV sedation, so we had a nurse anesthetist administer it. The team and I prepped tooth numbers 3 to 15, and tooth numbers 18 to 31. I used a technique with a leaf gauge to assess and capture the patient’s vertical. I opened her anterior vertical about 2.5 mm.
I also contoured Bethany’s gingiva in the anterior, approximately 1 mm of her gingival tissue, with a CO2 laser to create more length. I usually plan for gingival contouring on the cosmetic wax-up. Even after the wax-up is done, I expect some areas to be adjusted so that when I make the temporaries, they’re based on where I expect the gums will be after gingival contouring.
I was able to prep Bethany’s teeth without any problems. The appointment lasted about six hours. And she was happy with the way everything turned out—even with just the temps.
LIVING WITH THE TEMPS
After the temporaries were in, I asked Bethany to return for a follow-up appointment so we could make any adjustments if needed. Whenever possible, I make changes directly on the temporaries. I might say to the patient, “We’d like to shape this back,” or “We could make this canine a little less pointed,” etc. When I fine-tune all the details on the temps, the permanent restorations go in much more smoothly.
I also checked Bethany’s bite and made sure that she was comfortable. It’s easier to check the bite on the follow-up visit rather than immediately after placing the temps when the patient is likely still groggy from sedation. I made two adjustments on tooth numbers 18 and 31 and had to take additional impressions for those two teeth. Otherwise, every-thing worked well. I generally always expect to make a couple of minor adjustments when treating a patient’s entire mouth.
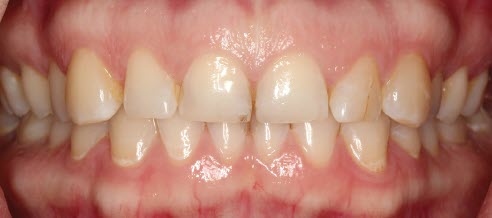
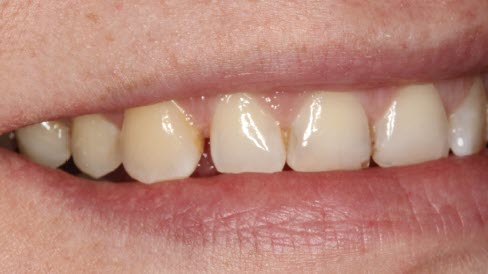
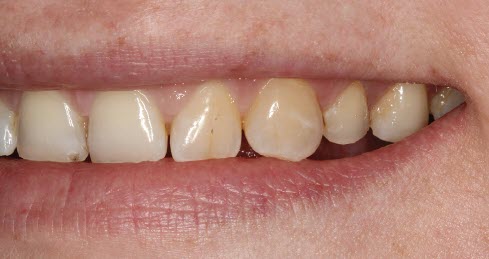
Finally, we talked about what tooth shade Bethany wanted for her new smile. Bethany chose a shade of OM3, with a gradient. She stayed in the temps for about six weeks.
SEATING THE PERMANENTS
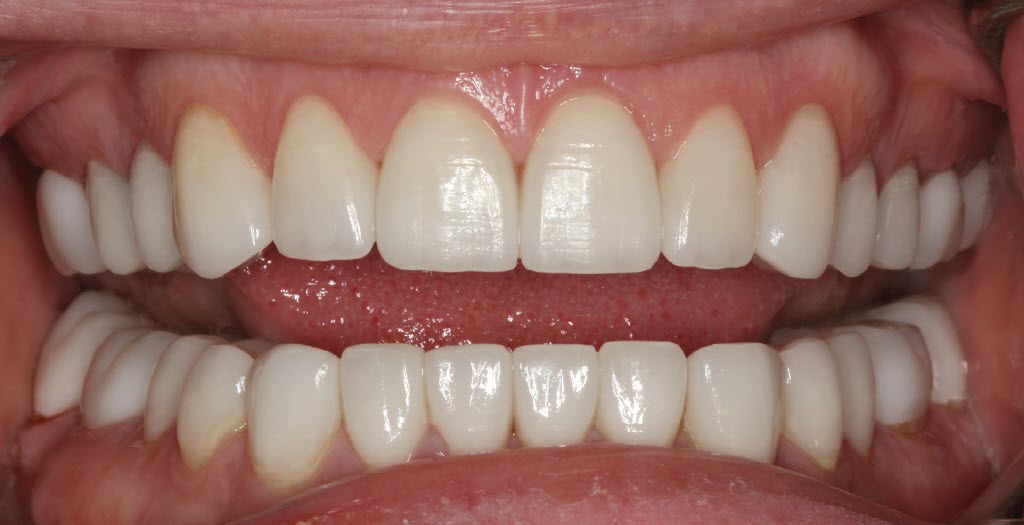
For Bethany’s permanent restorations, we used Arrowhead Elite restorations, which is why they look so awesome. She did not do IV sedation for the seating appointment (usually patients opt not to use full sedation for that appointment because there isn’t as much “heavy” work on the mouth).

The patient reported no problems with her temporaries, so we proceeded to prepare to seat her permanent restorations. For seating full mouth cases, I follow a protocol that I’ve used for a long time. It’s basically the standard protocol that I learned from the Dr. Dick Barnes Group (DDBG) Clinical Hands-On course.
For seating full mouth cases, I follow a protocol that I’ve used for a long time. It’s basically the standard protocol for the DDBG courses.
I proceeded with treatment as follows:
BETHANY’S SEATING PROTOCOL
- Take the temporaries off, section by section
- Clean the dentin with Consepsis™
- Etch the teeth
- Apply Telio® desensitizer
- Use Adhese®
- Prepare the restorations for bonding
- Clean out the inside of the crown with Ivoclean
- Use a ceramic etchant if it requires more etching
- Try-in the crown and make any light contact adjustments as needed
- Use OptiBond™ adhesive inside the restorations
- Use Variolink® Esthetic cement to bond the crowns in place
- Do an initial cure to get the cement to a gel state
- Clear off any excess material and then floss and use an interproximal saw to remove any cement that doesn’t come off with floss
- Finish the margins with a series of fine diamond burs, if needed
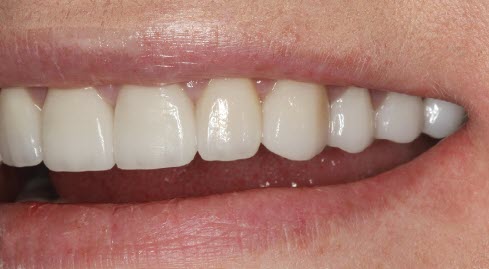
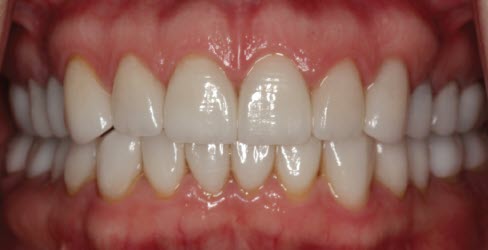
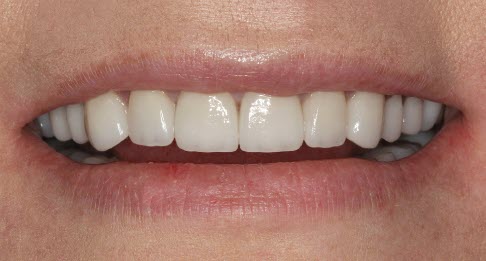
THE FINAL RESULTS
When the finals were placed and Bethany saw her new smile, she was as happy as can be! She loves everything about it! And now when she comes into the practice, she tells me that people constantly make comments about her beautiful smile.
Currently, Bethany wears a nocturnal occlusal splint to protect her dental work, and she maintains her new smile with regular hygiene appointments. Even though I don’t use social media often, within days finishing Bethany’s work, I noticed that she was posting photos of herself with her new smile. It gave her a new level of confidence that she couldn’t get from basic dentistry. As a dentist, it’s rewarding to hear positive remarks from your patients and to see them enjoying their new smiles.


