

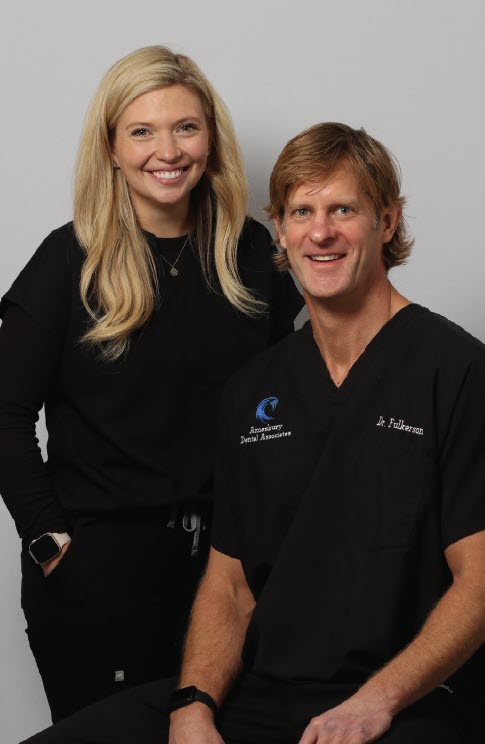
As the owner and a dentist of Amesbury Dental Associates in Amesbury, MA, I have worked with Lauren Flate-Gianakakis, our front office coordinator, for several years. Together, we’ve worked at refining our strategies for presenting treatment options and providing financial arrangements for our patients. Because of her experience in this area, Lauren had become familiar with the process of smile design and smile makeovers, and she had witnessed many cases from start to finish. Therefore, when Lauren asked if I would consider redoing her smile, I was truly honored.
Photos help not only in planning the most ideal smile proportions, but also in communicating more effectively with the dental lab.
THE IMPORTANCE OF PLANNING
We started Lauren’s case by taking a complete set of 11 photos and upper/lower vinyl polysiloxane (VPS) impressions to use for diagnostics and treatment-planning. For me, photos are a critical component for achieving a predictable result. Photos help not only in planning the most ideal smile proportions, but also in communicating more effectively with the dental lab.
Our photo series includes:
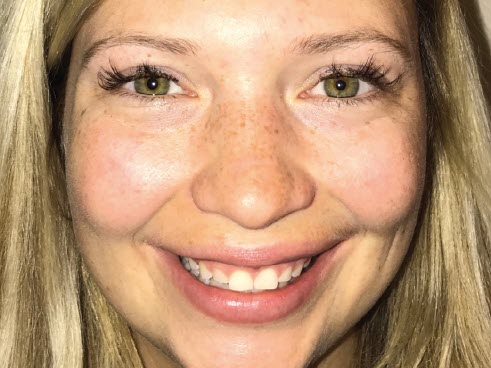
- Full face, smile
- Full face, retracted
- Full face, repose (slightly open with lips relaxed)
- Close-up, smile
- Close-up, repose
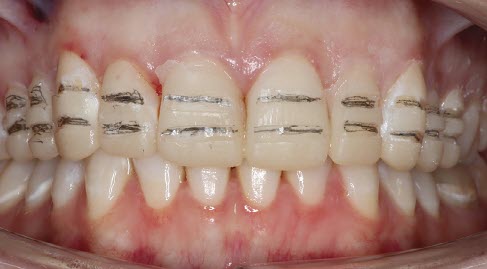
- Close-up, retracted front view with teeth together
- Close-up, retracted from right with teeth together
- Close-up, retracted from left with teeth together
- Upper occlusal view (using mirror)
- Lower occlusal view (using mirror)
- Profile view
Over the years, I’ve heard many opinions about ideal smile proportions, such as the “Golden Proportion” or the “Recurring Esthetic Dental (RED) Proportion.” I’ve concluded that no one proportion works for all patients all of the time. Examining photographs with calibrated measurements allows me to better customize proportions to each individual patient’s facial profile, skin tone, gender, and age.
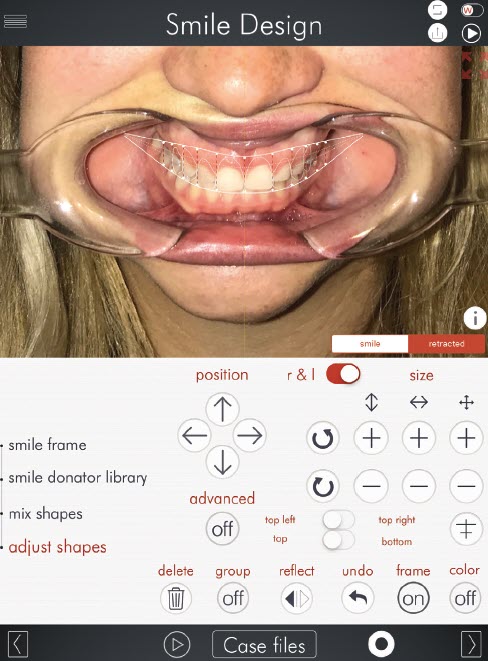
For years, I used templates in Keynote or PowerPoint to design a patient’s smile. While this approach has worked well, some newer applications for digital smile design (DSD), such as SmileFy (which we use), have streamlined the process and also provide a way for improved patient communication and increased case-acceptance. DSD photos show patients what is possible and allow for patient input.
THE TWO ESSENTIAL PHOTOS
Although I encourage taking a full set of diagnostic photos, the two photos I use most often are: full face, retracted and full face, smile. These two photos can quickly be taken at a patient’s initial exam and later be imported into DSD to begin a preliminary 2D smile design. Existing tooth proportion measurements can be acquired intraorally, or from models that were taken at the initial diagnostic appointment.
When used properly, DSD can be used to determine when additional treatment such as orthodontics or crownlengthening may be indicated.
With some basic training and practice, most 2D smile designs can be completed in about 10 to 15 minutes. Training sessions are available through the DSD app. After completion of a 2D smile design, I usually ask the patient to return to the practice to review a proposed treatment plan that includes a summary of procedures, timeline, and cost. The patient is also shown a before-and-after smile design proposal.
The proposed treatment plan creates excitement and builds value for the patient by showing what is possible. Patients often acknowledge that we have already invested time in their case before they have even committed to treatment. The preliminary DSD demonstrates our commitment and builds patient confidence, which ultimately results in a high case-acceptance rate.
My only word of caution is to avoid presenting a smile design that is not possible to achieve within your dental practice. On a computer screen, it’s easy for a general dentist to cover over diastemas, misaligned teeth, and severe gingival irregularities in order to create the “perfect smile.” However, such results may not be possible without orthodontics or additional specialized treatment.
When used properly, DSD can help determine when additional treatment such as orthodontics or crown-lengthening may be indicated prior to reviewing the case with a patient. This helps dentists avoid unwanted surprises down the road and establishes realistic expectations for the patient.
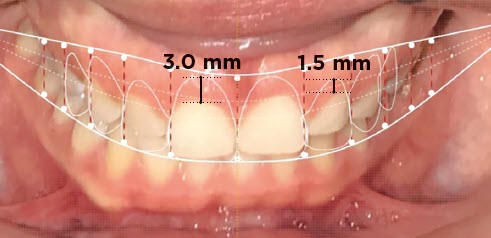
Lauren had seen many digital smile designs, but it was exciting for all our team members to see her possibilities for treatment. While we knew that she would need aesthetic crown lengthening, DSD allowed us to determine how much we would need to modify her gingival contours and request that it be incorporated in the white wax-up. We also realized that although her front teeth were short, her incisal edges were in approximately the correct position.
I took Lauren’s measurements and put them on the final screen of the DSD app. I then took screen shots of the image for communication with Arrowhead Dental Laboratory. This enabled us to clearly demonstrate that her central incisors needed to be lengthened in a gingival direction by about 3 mm, and her lateral incisors by about 1.5 mm. Her central incisal edges would only be lengthened by <0.5 mm and contoured ideally.
LAUREN’S TREATMENT
Once the diagnostic wax-up was completed with the requested proportion changes shown in DSD, Lauren was scheduled for aesthetic crown lengthening. The clear preparation guide that Arrowhead provides with each white wax-up is an excellent way to measure and mark the proposed gingival heights prior to the initial gingivectomy.
In Lauren’s case, due to the extent of gingival recontouring, I knew she would require bone recontouring in order to preserve a 3.0 mm biologic width. After six to eight weeks of healing, Lauren was ready for preparation of her veneers. However, due to an extremely busy time in our practice, we waited almost a year before prepping her Elite porcelain veneers.
During that time, we preserved her biologic width during the crown lengthening so the tissue would remain in the desired position until we were ready to begin our prosthetic plan. We would have seen significant tissue rebound of the gingiva if we had not respected the ideal 3 mm biologic width through bony recontouring.
When prepping Lauren’s teeth for veneers, I used a diode laser to make minor refinements for gingival contours. I also used a
Sil-Tech® matrix to place a bisacrylic temporary material onto the unprepared teeth as a mockup. This process enabled us to verify that our provisional was similar to the previously planned DSD. This step is a predictable one because we carefully plan our cases using the DSD process, and we always verify the proportions when the wax-up returns from the dental lab.
The mockup gave us a matrix to make 1.5 mm incisal and 0.5 mm facial depth cuts through (see above). The depth cuts were marked, and the teeth were prepped through the mockup material until the marks were gone. This helped prevent over-prepping and ensured that the majority of the preps remained in enamel and therefore had a stronger bond for the final restorations. At that point, adequate reduction was also checked using the clear reduction guide for crown lengthening. A full arch impression was taken using Indentium® (polyether siloxane).
Provisionals were fabricated using the Sil-Tech® matrix from our white wax-up. It is extremely important to ensure that the matrix is seated on the palate without applying firm pressure over the incisal edges because this can result in over-seating and shortened anterior teeth.
Once Lauren was 100 percent sure that she was satisfied with her provisionals, we took a VPS impression. The lab was instructed to use this impression to index the provisional incisal lengths and positions for the final Arrowhead Elite e.max® restorations.
Patients now have the opportunity to communicate their input prior to our office sending out materials for the diagnostic wax-ups.
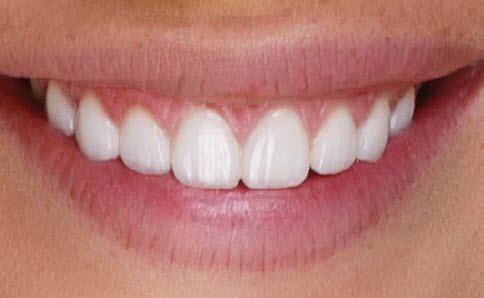
In less than a month, the final Elite e.max® restorations were delivered to our office. As Lauren’s preps were kept primarily in enamel, we were able to use minimal local anesthesia, which allowed her to smile and view and approve her new restorations prior to bonding.
We also took photos of the restorations tried in with Variolink try-in paste. This allowed the patient to take a second look without the concern of a veneer falling out. Once Lauren confirmed that she was fully satisfied, the preps were isolated and cleaned with Consepsis™ and GLUMA was placed for desensitization. The final restorations were placed using Variolink Esthetic LC.
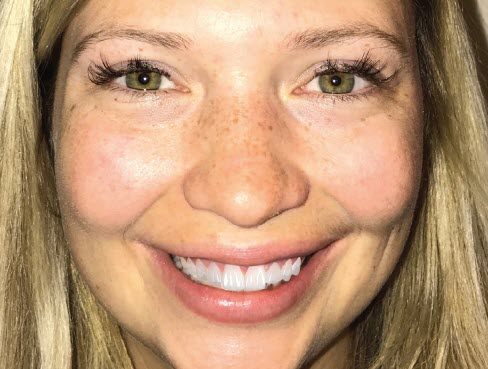
THE RESULTS
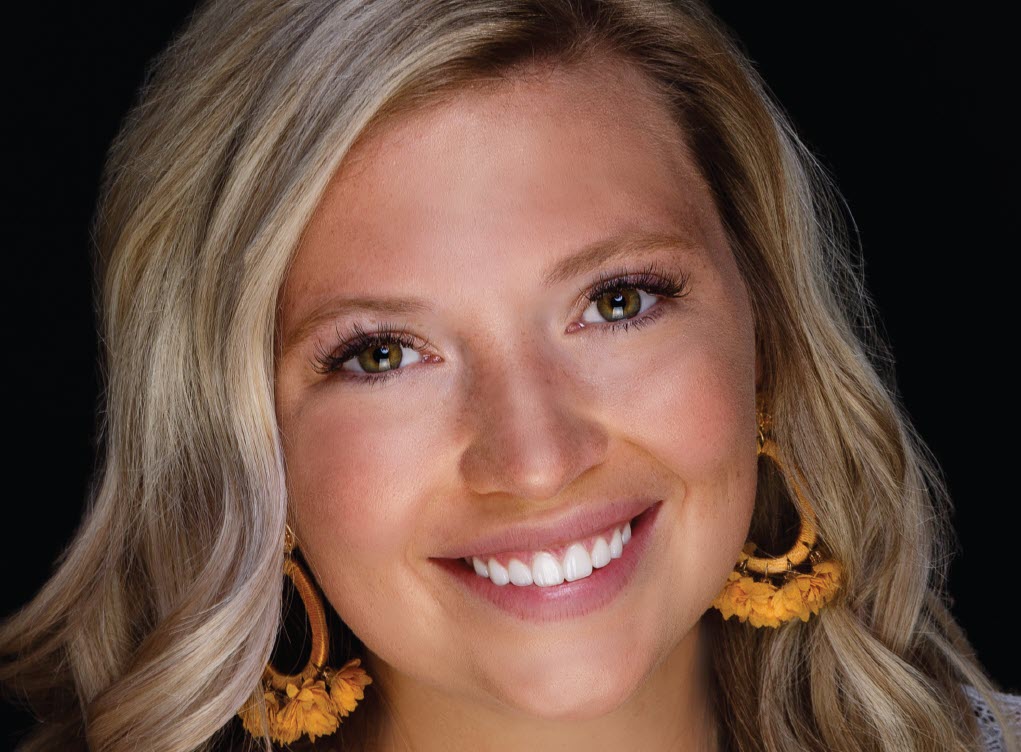
For years, our dental practice has been fine-tuning its systems in an effort to provide the highest quality care in a predictable, streamlined, and highly profitable manner. Digital smile design has been one of the most significant contributions to this ever-evolving challenge. It has enabled us to improve our communication and increase our case-acceptance with patients. Patients now have the opportunity to communicate their input prior to our office sending out materials for the diagnostic wax-ups, helping to ensure that we achieve the patient’s desired smile. With DSD, the results are more predictable.
Having one of our own team members experience this process personally has further affirmed the value of an organized and predictable protocol for delivering a smile design and makeover. Lauren felt that she was truly a part of the treatment process and had the opportunity to give her input along the way.
I encourage anybody who is interested in enhancing their cosmetic results to consider trying a few cases using a DSD application. Additionally, consider giving one of your committed team members the opportunity to have his or her smile redone at a reduced cost. Not only will it give you a chance to refine your smile design system, but it will speak volumes to your patients about the confidence your team has in your work. Most importantly, have fun! When results become more predictable, dentistry becomes more enjoyable. Watching Lauren’s case from start to finish was fun for our entire practice—and we were happy to see her beautiful new smile.


