

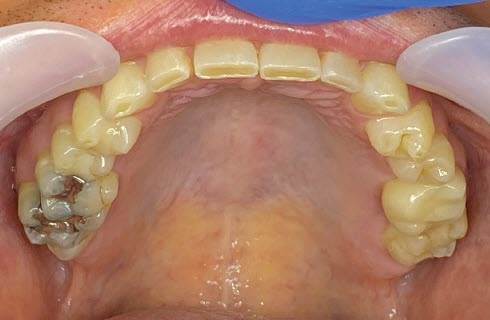
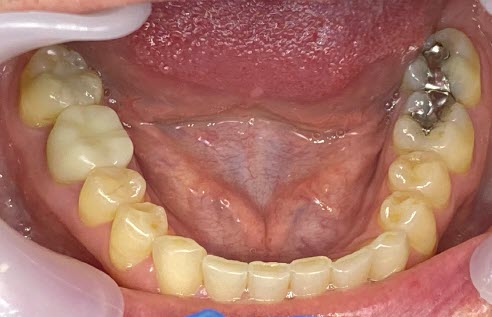
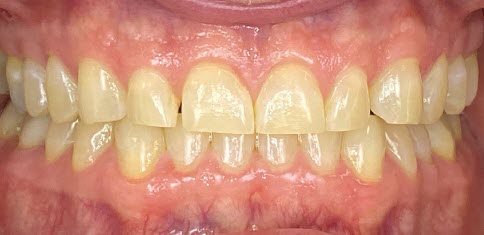
About 15 years ago, as a student in dental school, I learned that my patients weren’t the only ones who needed work done on their teeth. As I looked in the mouths of others, I recognized that my own teeth were showing significant signs of wear and tear. I realized that I needed major dental work too.
As I looked in the mouths of others, I recognized that my own teeth were showing significant signs of wear and tear.hen the clinician makes adjustments to resolve the complaints and it becomes a repetitive process.
Although I didn’t know exactly what to do, I knew something would eventually have to be done. After dental school graduation, I recognized that I still didn’t quite have all the knowledge I needed to fix my issues. So I went to work and started actively pursuing additional educational opportunities.
LEARNING NEW SKILLS
About six months out of dental school, I met Hernan Varas, who is a Practice Development Executive at Arrowhead Dental Laboratory and the Dr. Dick Barnes Group (DDBG) in Utah. Hernan invited me to attend the Full Arch Reconstruction course. While I was there, I also met Dr. Jim Downs, the course instructor. During that class, I learned a process for restoring severely worn cases.
After the course, I was able to help my patients with full arch dentistry. My dad was the first full mouth rehabilitation case I ever did. It was gratifying to be able to offer additional treatments that helped my patients with severe dental conditions.
In the meantime, I knew my own dentition was worsening, but like many patients, I put off treatment. At the time, I was only 30 years old, and I was busy. For 10 years, I toyed with the idea of going to Dr. Downs’ practice in Colorado and having my teeth restored, but it didn’t happen.
About five years ago, I hired Dr. Heston Farnsworth as an associate in my dental practice, and Dr. Downs said, “You should ask Dr. Farnsworth to restore your teeth.” But somehow it still didn’t happen.
As time went by, my symptoms kept getting worse. I had headaches every day. And jaw pain and neck pain too. I even started to have some vision changes. When I had those headaches, I would lose some peripheral vision. It was a battle every day.
MAKING THE DECISION
Early in 2022, I visited Arrowhead and chatted with Kent Garrick, Director of Technical Services, about my symptoms. He said, “Doc! It’s time for you to do this.” Then Peggy Nelson, Arrowhead’s Director of Business Development, overheard our conversation and said, “Dr. Tomlinson, why are you waiting?” In all honesty, I wondered if I really deserved it or if I wanted to spend the money. But after I left Arrowhead, I kept thinking about what Peggy and Kent had said.
For 10 years, I toyed with the idea of going to Dr. Downs’ practice and having my teeth restored, but it didn’t happen.
Not surprisingly, my symptoms got progressively worse. Each day, I took medication to get through the day. In April of 2022, I decided to have my impressions taken. I talked to Dr. Downs and said I was finally ready to get the work done.
I decided to get my treatment done during the August 2022 DDBG Clinical Hands-On course. During the class, Dr. Downs mentored Dr. Farnsworth throughout my treatment. It wasn’t Dr. Farnsworth’s first full mouth rehabilitation case. He had actually worked on his dad too.
Dr. Downs suggested that we do the full mouth in two days. Typically in the Clinical Hands-On course, they don’t do a patient’s uppers and lowers in the same course. But we decided that Dr. Farnsworth would prep my upper arch on the first day, and prep the lower arch on the second day.
OPENING MY BITE
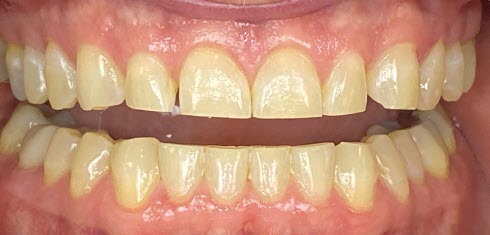
When Dr. Farnsworth looked at my impressions and mounted the models, he noted that I had a Shimbashi of about 11 mm. In other words, my bite was collapsing. So the team at Arrowhead made an orthotic for me to wear prior to the course, which opened my bite to a Shimbashi of about 16 mm.
I had a Shimbashi of about 11 mm. In other words, my bite was collapsing.
When I first inserted the orthotic, it felt huge. I put it in in the morning and just tried to get through the day with it. I worried that if I wore it at night, I might pull it out. The first day I wore the orthotic, I spoke with a lisp all day. The lisp lasted for about three weeks, but I didn’t care. I was determined not to give up.
After two full days with the orthotic, I noticed my headaches starting to fade away. Soon, I was no longer taking medication for my headaches. My jaw pain was also beginning to diminish. After about three weeks, I no longer had any jaw or muscle pain.
I never managed to eat with the orthotic in place—that was too difficult for me. So I removed it to eat, and by the end of the meal, I inevitably started to feel muscle and jaw pain. I was always anxious to put the orthotic back in when I finished eating. In total, I wore the orthotic for just over three months before the Clinical Hands-On course.
I was concerned that opening my Shimbashi 5 mm might make my teeth look awkward or that it would permanently affect my speech. But after I became comfortable in that position, I didn’t want to go back to anything less. I didn’t mind if my teeth looked different because it felt so good to be out of pain.
PLANNING THE CASE
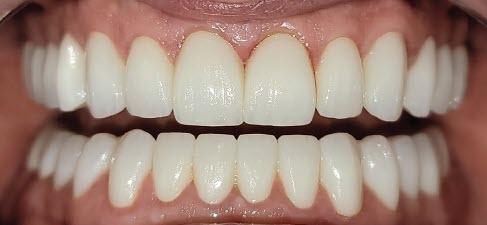
When planning for my restorations, I relied on the team at Arrowhead. I wanted a natural look. I mentioned some cases that I liked, and the lab took it from there. They made my laterals a bit bold, and Kent said, “Take a look—we can soften them if you want.” But I liked the look and I knew it would turn out great.
THE PATIENT EXPERIENCE
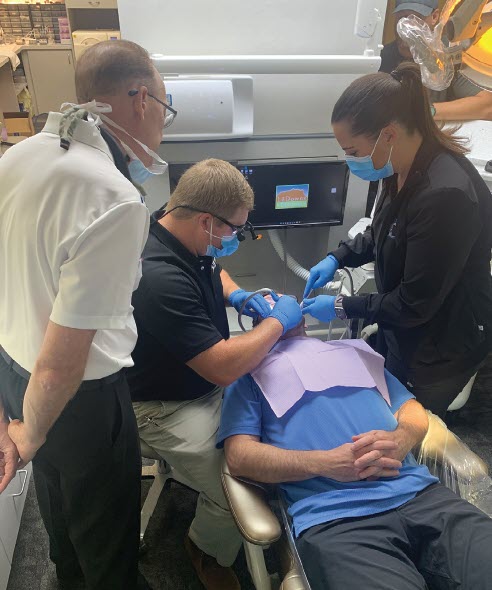
I flew to Denver, CO, for the Clinical Hands-On course on August 26, 2022. The first day, there was a morning class for the doctors and Dr. Downs included me in that instruction. Then, as Dr. Downs often says, it was “go-time.”
I had 3D X-rays taken to confirm the plan. After everything checked out, Dr. Farnsworth began prepping. He prepped the upper arch first and then fabricated the temporaries. After the temps set for two minutes, he pulled them off, sectioning them into three sections.
He did the posterior right, posterior left, then the anterior segments, and trimmed it all up so that it would fit onto my preps. To hold everything in place, Dr. Farnsworth put them on with Vaseline®, which worked with suction and allowed me to eat dinner that evening. The next day, the upper temps were easily removed.
When we got to the course, Dr. Farnsworth numbed me up on the lower arch but didn’t numb anything on the upper arch. And then he prepped the lower sections, just like he did the uppers. Dr. Farnsworth pulled the temporaries off the upper and relined my bite with the bite registration from the previous day. And then he put the temporaries back in to protect my teeth from the sensitivity of the hand piece and the air piece.
Dr. Farnsworth then prepped the next section. Once the preparation was done on the lower arch, he took the final bite with the temporaries off. He cemented the temps with Telio® Link on the uppers and used the shrinkwrap technique that he learned at the Dr. Dick Barnes Group’s Full Arch Reconstruction course (with the Sil-Tech® matrix) on the lowers.
Throughout prepping, I felt no pain. I didn’t take any medication for the procedure, and I didn’t need any. About 15 minutes into the procedure, I felt so comfortable, I fell asleep! As a patient, it was much easier not to have the upper and lower arches done in one long day. I came in, they numbed me up, they left the temps on until the end and then took them off to capture my bite, and that was it! It took about six hours to prep the upper arch on Friday and four hours to prep the lowers on Saturday.
As a dentist, I’ve done both arches in one day for patients, but it makes for a really long day. Splitting up the treatment over two days is a great alternative.
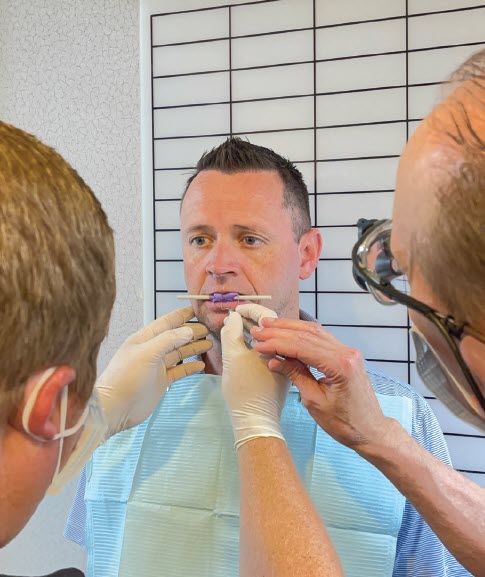
THE FIRST REVEAL
When all the prepping was done, Dr. Downs asked me to look at the temps in the mirror. Seeing my new smile was surreal. It exceeded all my expectations! As I looked in the mirror, I felt like I could see all the hard work from everyone who contributed to my case—I felt like I could see all the effort, planning, and experience that went into my treatment.
I felt grateful to the technicians at Arrowhead because they took a lot of pride with my case. I was also thankful to Dr. Downs for making an exception so that I could get both upper and lower arches done in the same course. Of course, I felt gratitude for Dr. Farnsworth because he was willing to do my work. We had two dental assistants there, and one of the assistants has been with my practice for 14 years. It was fun to watch them work from a patient’s perspective.
I knew my new teeth were going to look good, but I didn’t know they were going to look that good—and it was just the temps! They looked like the best version of my smile that I’d ever had.
I knew my new teeth were going to look good, but I didn’t know they were going to look that good—and it was just the temps!
After the class, I went back to the hotel and FaceTimed my wife, who I’ve been married to for 23 years. I was so excited to show her the temps. She said, “Who are you? You don’t even look like my husband!”
With the temps, I felt better overall and had better chewing capability. Eliminating the headaches was the biggest change, but other things improved too. I had more energy and even started a workout regimen!
THE PERMANENT RESTORATIONS
I can speak to my patients with conviction about the process of a full arch case. I can say, ‘I know what you’re going through because I’ve been there too.’
In October of 2022, Dr. Farnsworth and two of our dental assistants (Chey Lynn Long and Shaylin Vincent) returned to Denver, CO, for the second part of the Clinical Hands-On course—seating the permanent restorations.
On the first day of this seminar, Dr. Farnsworth administered the anesthesia and then immediately removed my temporaries. He went through the process of sectioning the uppers and removing them carefully so that none of the gingival tissues were nicked.
I took good care of the temporaries at home because some of my patients have not been so diligent with that. And I know that it’s much harder (if not impossible) to seat a case if the home care hasn’t been stellar.
My permanent restorations are made from all zirconia—e.max® Prime in the posterior and ZirCrown™ aesthetic in the anterior. The cement was Ivoclar ZirCAD resin-modified glass-ionomer cement. Dr. Farnsworth was able to cement everything (no bonding required), and he worked quickly. He was done cementing in about three hours.

I’m so happy with my permanent restorations! Roy Petersen, Arrowhead’s ceramics supervisor, made them, and they are amazing! When I saw the restorations for the first time, I could sense how much work, training, and years of experience were involved in my case. Roy was at the seminar, and I even got to meet his wife, so that made it a special experience.
The next day, Dr. Farnsworth took a T-Scan™ of my mouth. Tooth number 15 was hitting a little early. It was interesting because as a patient, I sensed the force in the tooth number 5 area, but the scan indicated tooth number 15. Dr. Farnsworth did a minor adjustment, and I could feel that my muscles weren’t quite ready for that. So he made some small adjustments on my teeth later.
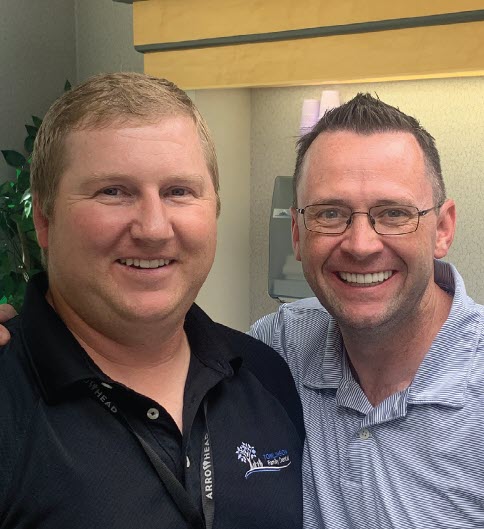
LIFE WITH MY NEW SMILE
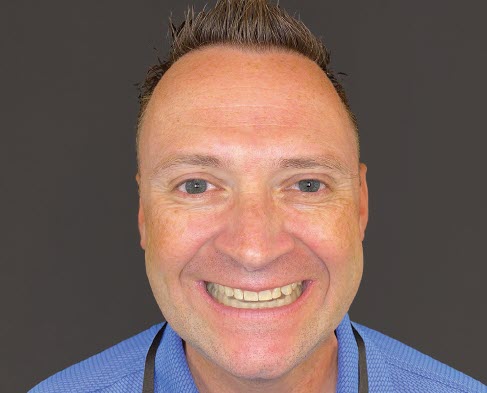
The response that I’ve gotten from people who know me is usually longer-than-normal stares. I can tell from their expressions that they’re trying to figure out what’s different about me. Only close family members and colleagues noticed my new smile immediately. I’m glad for that reaction because it’s exactly what I wanted. I wanted my restorations to look natural.
Another benefit of having my teeth restored is that I can speak to my patients with conviction about the process of a full arch case. I can say, ‘I know what you’re going through because I’ve been there too.’ I can better empathize with my patients about all of it—the uncertainty about the outcome, the worry about finances, and even the pain from leaving the dental work untreated. I can tell my patients with a surety that the procedure will change and improve their lives. It certainly changed and improved mine.


